In the process of updating our upstairs living room I knew I really wanted to incorporate a gallery wall somewhere in the space. Reason #1: everyone and their mother seems to have some kind of gallery wall in their house right now and I'm envious, and Reason #2: it would give me an excuse to show off some of my favorite prints and pieces. I'm sure there are probably a dozen different ways to assemble and hang a gallery wall, but I'm going to walk through the method that worked for me.
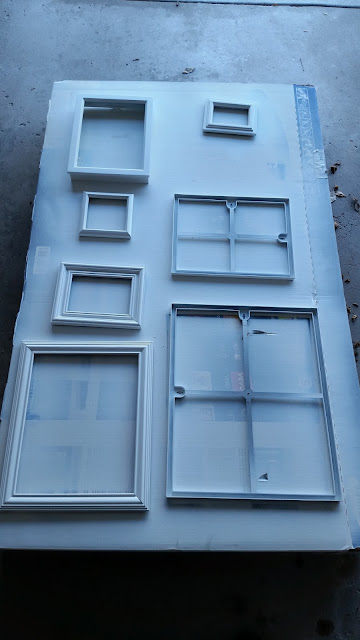
Step 1: Collect pieces for your gallery wall. This is the fun part! Gather up any and all wall hangings that you want to have displayed. If you need frames I'd suggest stopping by your local Goodwill or secondhand store. Don't worry about the size, color, or width of the frame - having variation is a good thing! But if you do want your frames to have a more cohesive look, you can do what I did and spraypaint most (or all) of them the same color. So even though each frame might be a different style, having them all be the same color makes them more visually relatable.
 |
| Large cardboard boxes work great for spraypainting, BTW. |
If you're looking for some ideas of what you can include in your gallery wall frames, here's a few suggestions:
-Pinterest is a great resource to locate free gallery wall images. I found a few of mine using this site. For example, the blue feather print can be found
here, the arrow print
here, the antlers
here, and the birds nest
here.
-
Check Etsy. Many artists sell digital prints of their art in multiple sizes for reasonable prices. Once you purchase the PDF you can take it to a copy store and have them print it on some nice heavy paper for you. You can also find other handmade items on Etsy including drawings, paintings, stitched pieces and other kinds of mixed media designs.
-Use old
gift bags/wrapping paper/tissue paper that you have stashed away. If you're like me and have small scraps of wrapping paper saved up, now's the time to use it!
-Display
old cards that you received from friends or loved ones that have a neat design on the front.
-
Scrapbook paper comes in tons of colors, textures, and designs that you can use.
-If you're into sewing use some of your
fabric scraps. You can even frame quilt squares or small embroidered pieces.
-
Secondhand stores like Goodwill or The Salvation Army can have some pretty neat wall art gems every once and awhile if you look hard enough. For example, the crocheted butterflies hanging on my gallery wall were from my local Goodwill. I actually removed them from their original felt backing and placed them on some fresh new fabric that matched my color scheme.
-
Sentimental items that you've saved can also look great in a gallery wall. Things like sheet music, recipe cards, handwritten notes, and family photos are all items you can consider including in your layout.
-
Hobby Lobby sells these packs of gallery wall images for super cheap- that's where a few of mine are from. The pack I bought looks like this:
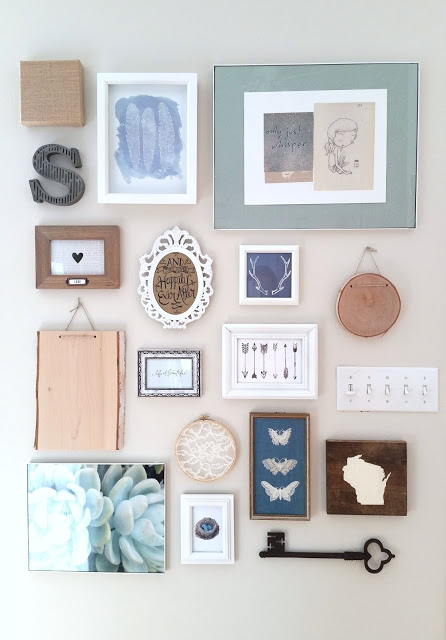
Remember that you don't have to just include framed pieces in your gallery wall - adding in other kinds of artwork like canvases, metal letters, embroidery hoops or other objects adds interest and variation to your assembly. I managed to find multiple odd items at Michael's that I ended up including in mine, like a burlap-wrapped canvas, a metal key, and some raw wood slices.
Step 2: Take 4-5 sheets of large sketch paper and tape them to your wall, making sure to overlap and tape them together until they fill up the entire wall space where you want your gallery wall to eventually hang. This will give you an an idea of how much wall space you will have available for all of your artwork. As you can see in the picture below cut out a space on the right hand side to allow room for our light switches. Don't worry about all the outlines shown here - that's taken care of in Step 4.
Step 3: Once you have the area of your gallery wall mapped out, remove the assembled paper from the wall and place it on the floor. From there you can gather all of your artwork and experiment with the layout of all your separate pieces. I must have done half a dozen different mock-ups before deciding on the final one! Make sure to fill your frames with artwork first before you start. And here's a tip:
take a picture of each layout you try. That way, in case you want to move something back to where it was you'll have a reference of it's original location.
Here are a few tips from an old art major to help you figure out the placement of your artwork:
-
Decide on the location of your larger pieces first and make sure they are separated from each other. In the layout below you can see that both of my larger art-filled frames are on opposite sides of the paper - one is in the top right and one is in the lower left. Spreading the larger pieces out like this helps anchor the design and keeps it from looking to top-heavy or bottom-heavy.
-
Try to identify the main colors in each piece and make sure the ones that have similar color palettes aren't too close together. Referring back to the two largest framed pieces of art below: both of them also happened to have a mint color scheme going on so I placed them further apart. This kind of thinking also applies to items that have a similar shape, like square or round pieces. You don't want to have items that are too similar in color or shape grouped together because it will prevent your eyes from moving easily through your group of images.
-
Shake up the orientation of your frames: have some hang vertical and others hang horizontal.
-
Keep your spacing fairly even. I'm not saying you have to get out a ruler and have things perfectly symmetrical, but try and keep the distance between pieces consistent. There are some areas in my final layout where I have larger gaps and spaces but that was only because I didn't have small enough items to fill those gaps.
Step 4: After you decide on a final layout, take a pen or Sharpie and trace around all of your artwork. This will help you remember the location of each piece once you hang your paper back up on the wall.
After you've traced each piece you'll now want to go back and mark where all of your nail holes are. Carefully flip over each item and use a ruler or scrap piece of paper to measure the distance from the top of the frame to the hanger on the back, and then translate that to your paper layout by drawing a dot or "x". While this process is a little tedious, it makes the hanging part go SO much quicker!
Step 5: Once all of your nail holes are marked on your paper, remove all of the art and hang your "gallery map" back up on the wall.
Step 6: Hammer in all your nails right through the paper.
Step 7: Double-check that you didn't miss any nail marks. Once you're sure that all nails have been accounted for, remove the paper from the walls. Now if you took a picture of your final layout there's no need to keep the paper so you can laugh evilly while ripping it to shreds if you feel so inclined. But if you forgot to snap a photo then you may want to keep your paper intact so you can use your outlines as a hanging guide.
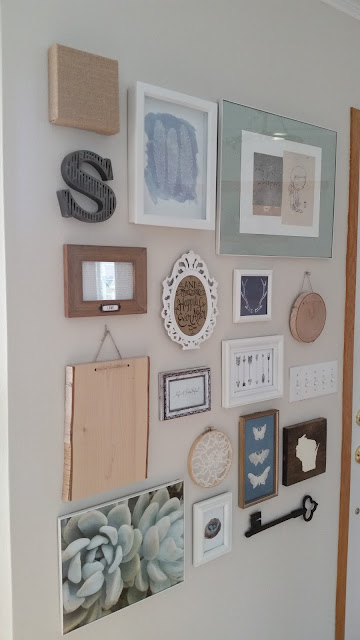
Step 8: Hang all of your artwork. (If that wasn't obvious....)
Now here's something I didn't figure out until after everything was hung up: if your gallery wall is near a door like mine, you may need to stick some foam tape to the back of your frames to make sure they don't shift. I soon noticed that every time the door was opened or closed all of my artwork would go askew which drove me
crazy. This foam tape saved the day! All it took was a few layered squares on the back of each piece and voila...no more shifting.
I still have a few pieces to finish, like the burlap square and raw wood slices. What to put on them....I just can't decide!
Source List:
-Michael's: Burlap square, wood slabs, and metal key
-"Only Just Whisper" print:
Kurt Halsey
-Metal "S": Urban Outfitters
-Heart/Life is Beautiful/Succulent art: Gallery Art booklet from Hobby Lobby
-"Happily Ever After" art: DIY (a closer look can be seen
here)
-Crocheted butterflies: Goodwill
-Lace embroidery hoop: DIY
-WI state wood plaque: local art shop
-
Feather art
-
Antler art
-
Arrow art
-
Birds nest art
Thanks for reading!


