Hey all - I'm so excited to FINALLY share our revamped living room! This space has been in the works for almost a year and has been updated bit by bit, piece by piece. There's still some things to be done, but I feel like it's finally at a point where it's worth sharing.
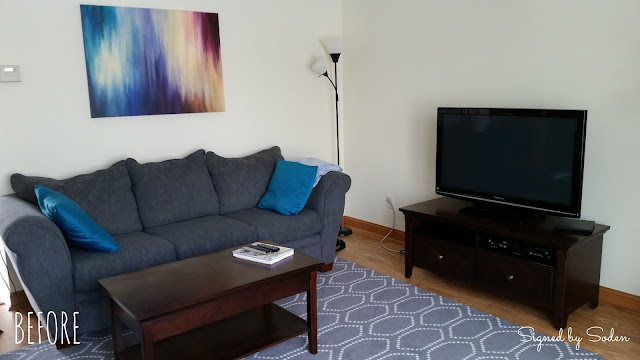
Here's what our upstairs front living room looked like shortly after we moved in:
Everything in this space was purchased for my old apartments - the only exception being the rug which we bought from Target shortly after moving in to the house. The sofas, coffee table, and end table were all bought off of Craigslist over five years ago. The painting on the wall is an original of mine that was made for my old apartment and the pillows were bought to match. Kevin's only contributions were his sad standing lamp and TV.
Here you can see the opposite side of the room. To the left is the front door (not shown) and in the top left is the door to the garage. The stairs leading down take you to our lower level living room and the guest bedroom (as well as the "Man Room" and laundry room which are a level below) and upstairs are the three main bedrooms. On the right side of the photo you can see a section of our dining room, and around the corner is the kitchen.
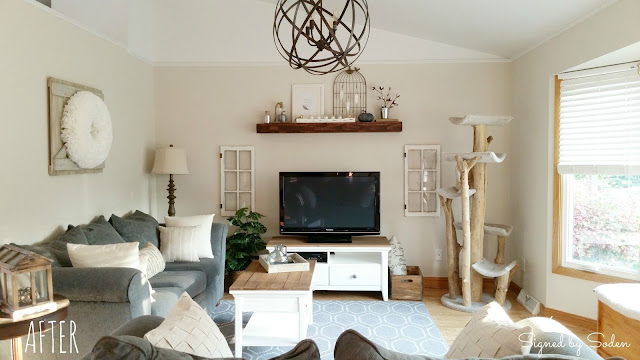
Now that you know what we started with I can show you where we've ended up almost 12 months later:
Gone are the yellow walls, dark furniture, bright pillows, and bare walls. I wanted to give the room a warmer and more rustic feel so we added some more wood elements along with some worn-looking pieces.
The picture below makes the walls look a little pink-ish, but I promise they're more of a tan/grey in person.
What immediately drew us to this house was the open concept of this level and the amount of natural light that the room received. Even on a cloudy day we rarely have to turn the lights on.
Normally you'd expect the first change in the room to be the paint color, but since we were waiting on help from family for that project we decided to skip ahead and make one small change first. At this point it was right after tax season and we had just received our refund (woohoo!). Being the responsible adults that we are, most of it went toward debt. But the tiny amount we got from back from the State could be spent on the house, and what did I choose to replace? The massive eye-sore of a light fixture hanging from the ceiling in the dining room. Seriously this thing was massive- the picture doesn't do it justice. One big bug-catching machine.
I shopped around online and was hard-pressed to find ANYTHING that fit the style I was going for that was under $300. Eventually we decided to just try shopping around town and ended up finding this beauty at BBC Lighting in downtown Milwaukee for $240. *Insert angels singing*
About a month after the chandelier was installed we painted. Annndddd just like every other time I paint a room it took me weeks of debating to figure out what color I wanted to go with. I knew I wanted to go with the greige route to keep things neutral and eventually narrowed it down to Behr's "Chocolate Froth" or "Wheat Bread":
I ended up buying samples of both colors and painted little swatches of them on various walls in the room to see how each looked at different times of the day. I highly recommend doing this - it makes the decision process sooo much easier. After much debate the lighter tone "Chocolate Froth" won out.
I knew going into this revamp that I wanted to give my old coffee table and TV stand a new lease on life. Both pieces aren't the highest quality and were pretty beat up, but I knew that with new tops, paint, and hardware they could be the center of attention. And look at them now! They look like completely new pieces.
With the help of our new miter saw cutting the boards for the tops was a snap, and I actually stained them using the vinegar/steel wool method which had decent results. I'm not super happy with the orangey tint of the wood so they may get touched up eventually.
After the furniture was given a face lift it was time to add decor and accessories. I brought out the terrarium we used as a card box from our wedding to sit on our side table and found these window picture frames at World Market to hang on either side of our TV.
Since our TV stand is fairly low to the ground we needed something to help fill the wall space above the TV screen. That's where our DIY floating shelf came in.
The cloche, pumpkins, and cottom stem all came from Michael's. The bird cage photo holder is from TJ Maxx and the small silver vase is from Target. The white candle holder is from JoAnn Fabrics.
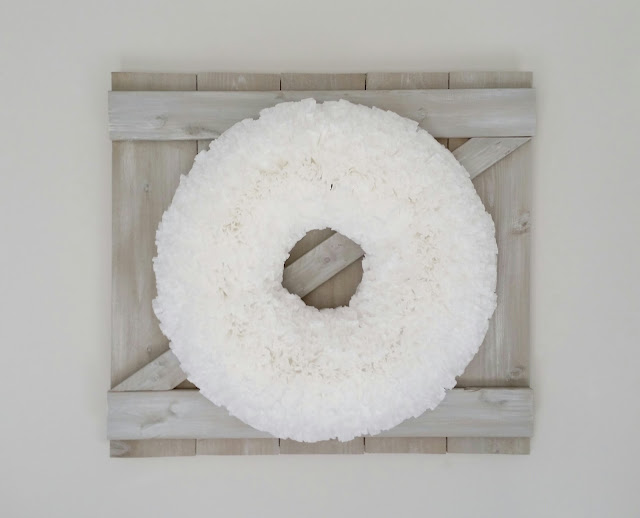
I had attempted to re-paint my large canvas with a color scheme that would better fit the new theme of the room but something still wasn't working. That's when I decided to switch gears and had Kevin make this barn door wall hanging inspired by Johanna Gains from HGTV's Fixer Upper. I'm addicted to the show/blog and love how she uses old shutters and doors as wall hangings in the homes she decorates. To finish it off I hung a coffee filter wreath I made on top, though I'm probably going to end up changing this since the wreath is a little big in proportion to the barn door.
Hanging on another wall is the thumbprint tree guest book from our wedding (the original post for that project can be found here). I love walking past this every day and seeing the names of so many people who where there on our big day to celebrate with us.
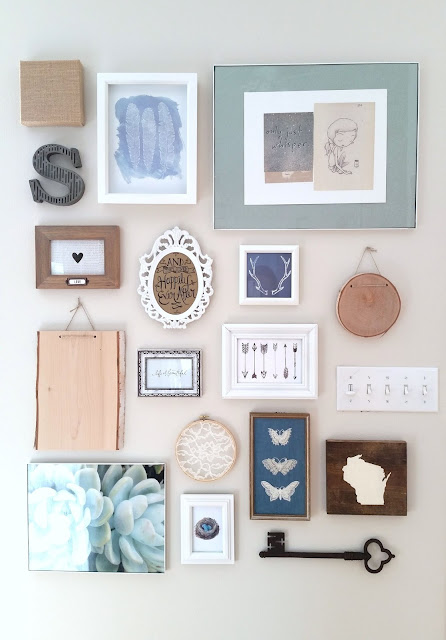
I also incorporated a gallery wall in the room to add some visual interest since all of the other walls in the room are decorated with larger pieces.
Source List:
-Paint Color: Behr "Chocolate Froth"
-Floating Shelf: DIY
-Window frames: World Market
-Barn door wall hanging: DIY
-Coffee filter wreath: DIY
-Floor Lamp: Walmart
-Chandelier: BBC Lighting
-Coffee table and TV stand: originally from Target, bought on Craigslist
-Key pillows: TJ Maxx
There are still a few changes I'd like to make to this room like adding window treatments, re-staining the chest by the window, and painting the trim white....but I'm sure those things will come with time. What do you guys think?! Let me know in the comments :) Thanks for reading along!


No comments